GoGuardian - Teacher Commands
Keywords: GoGuardian, Student monitoring, Web filtering, Classroom management, Internet safety, Device management, Digital learning, Activity reports, Screen monitoring, Online safety
Aliases: Classroom tech, EdTech platform, School web filter, Student activity tracker, Education management system, School tech control, Digital oversight, Learning guardian, Online class monitor, School device filter
This article will go over the various teacher commands in GoGuardian.
To interact with student devices and guide students, select a command button such as "open tab" and then select the students you want to issue the command to. Alternatively, you can select one or multiple student tile checkboxes (in the upper left corner of student tiles), or click into a student tile, and then choose the command.
Here is a video overview of some of the commands, we will look at more below the video.

Monitor Using Sessions: Teacher Commands
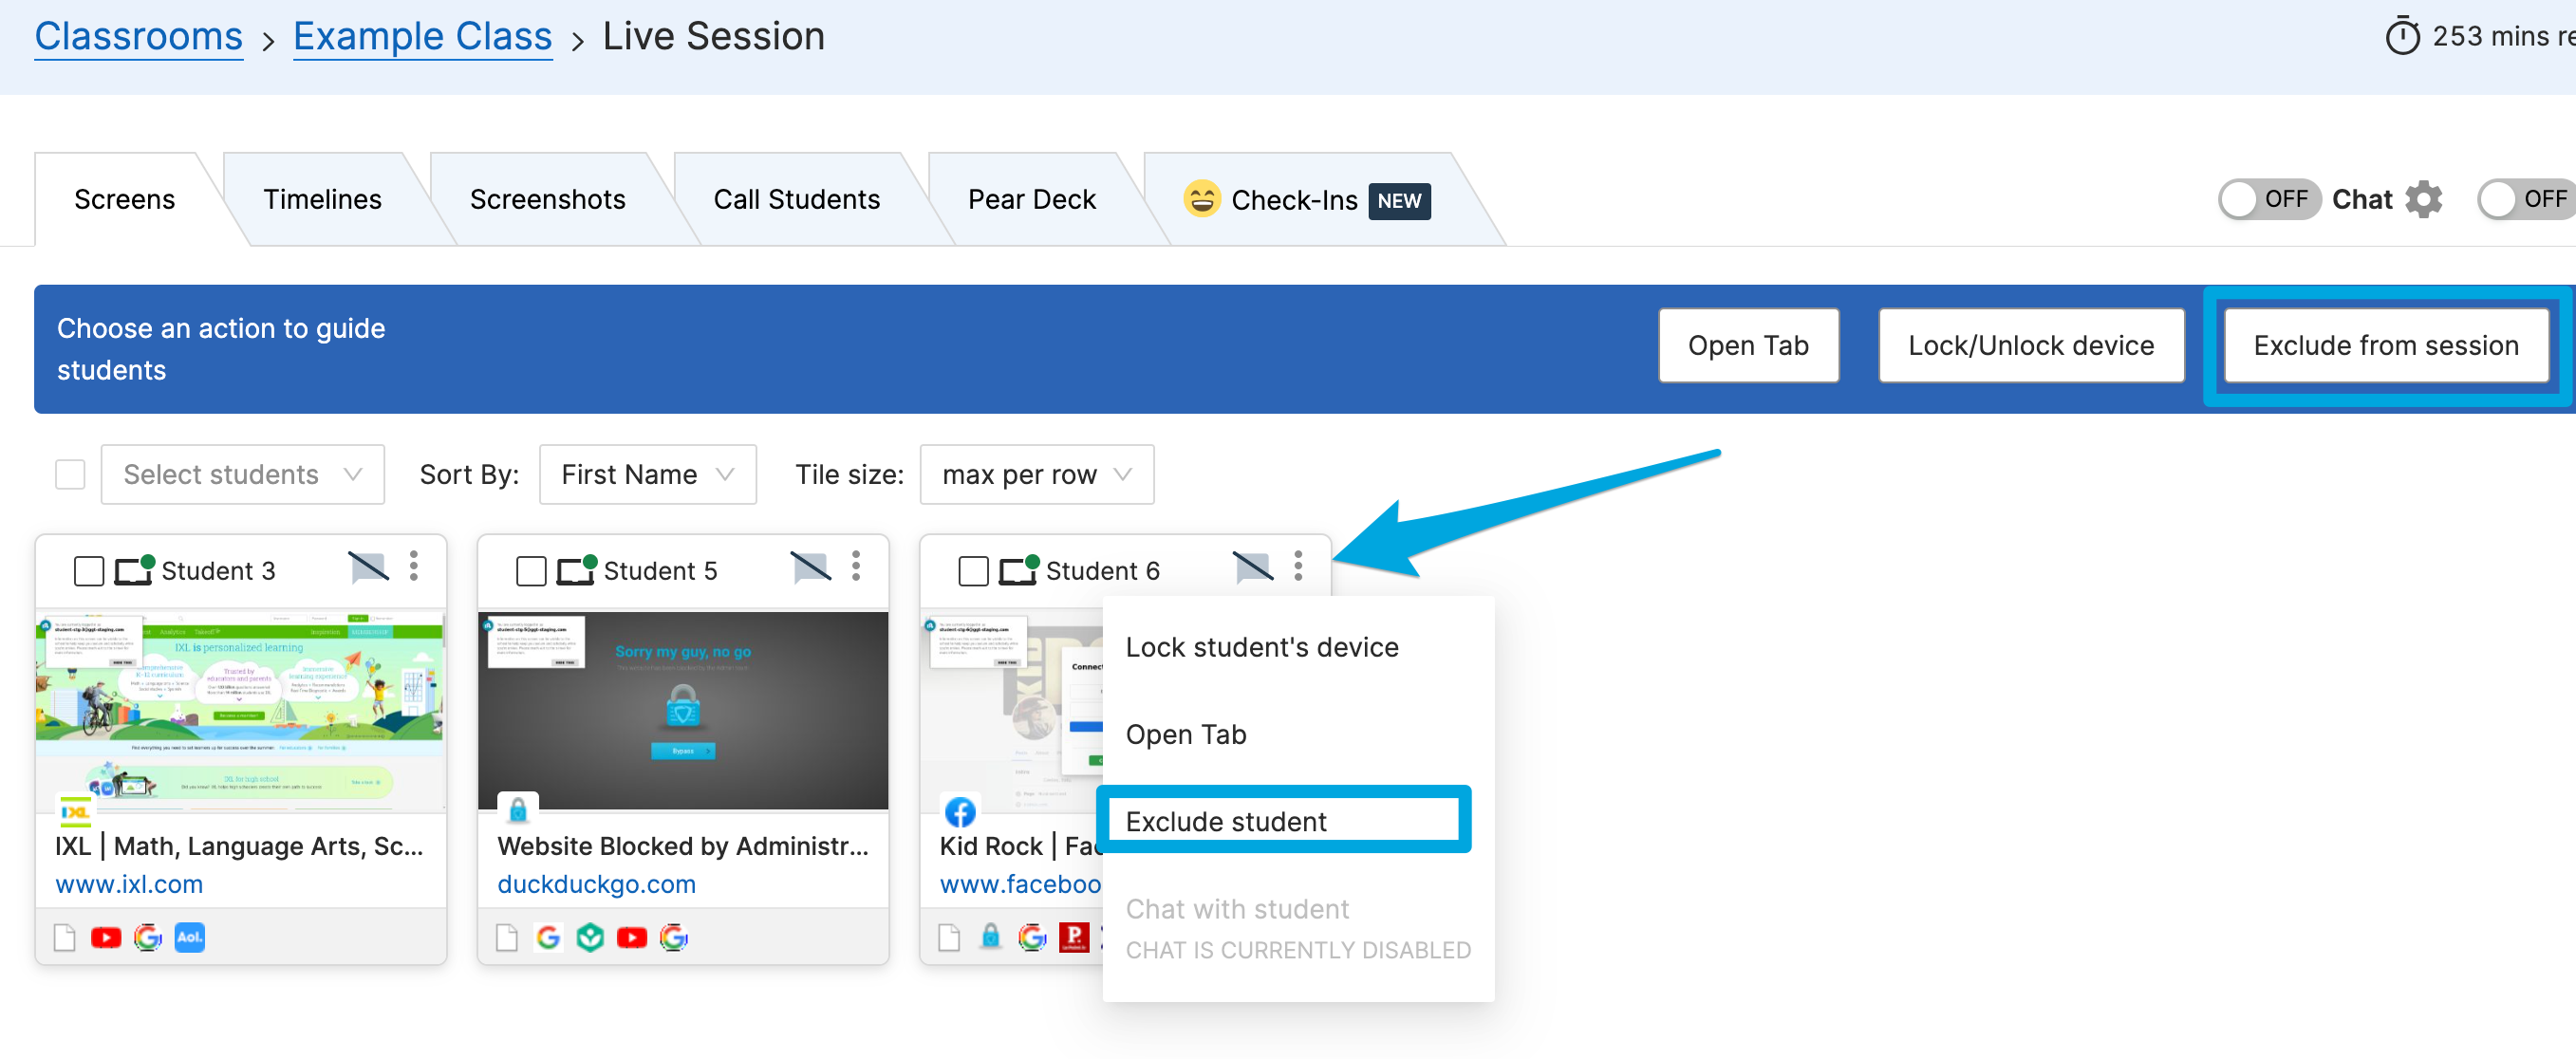
Exclude or Include Student from Session
Exclude selected students from your Screens view without deleting them from your roster, then include them back when necessary.
The Exclude command allows teachers to exclude a student from their class session. This command temporarily hides the student from both the main classroom view and Timelines views (where browsing data is captured).
'Exclude' can be useful for students who are absent for the day, or those working on something outside of class.
Students can be excluded and reincluded at any time during a session. Please note that excluding a student is temporary and will not delete them from the class roster.
To Exclude One Student:
- Click the 3 dots button in the corner of a student's tile.
- Click the Exclude student button
To Exclude Multiple Students:
- Click the Exclude from session button in the command bar.
- Select All or check the boxes next to specific students on the following menu.
-
Confirm by clicking the Exclude students button.
Click Here for more info on excluding students or Re-including them.
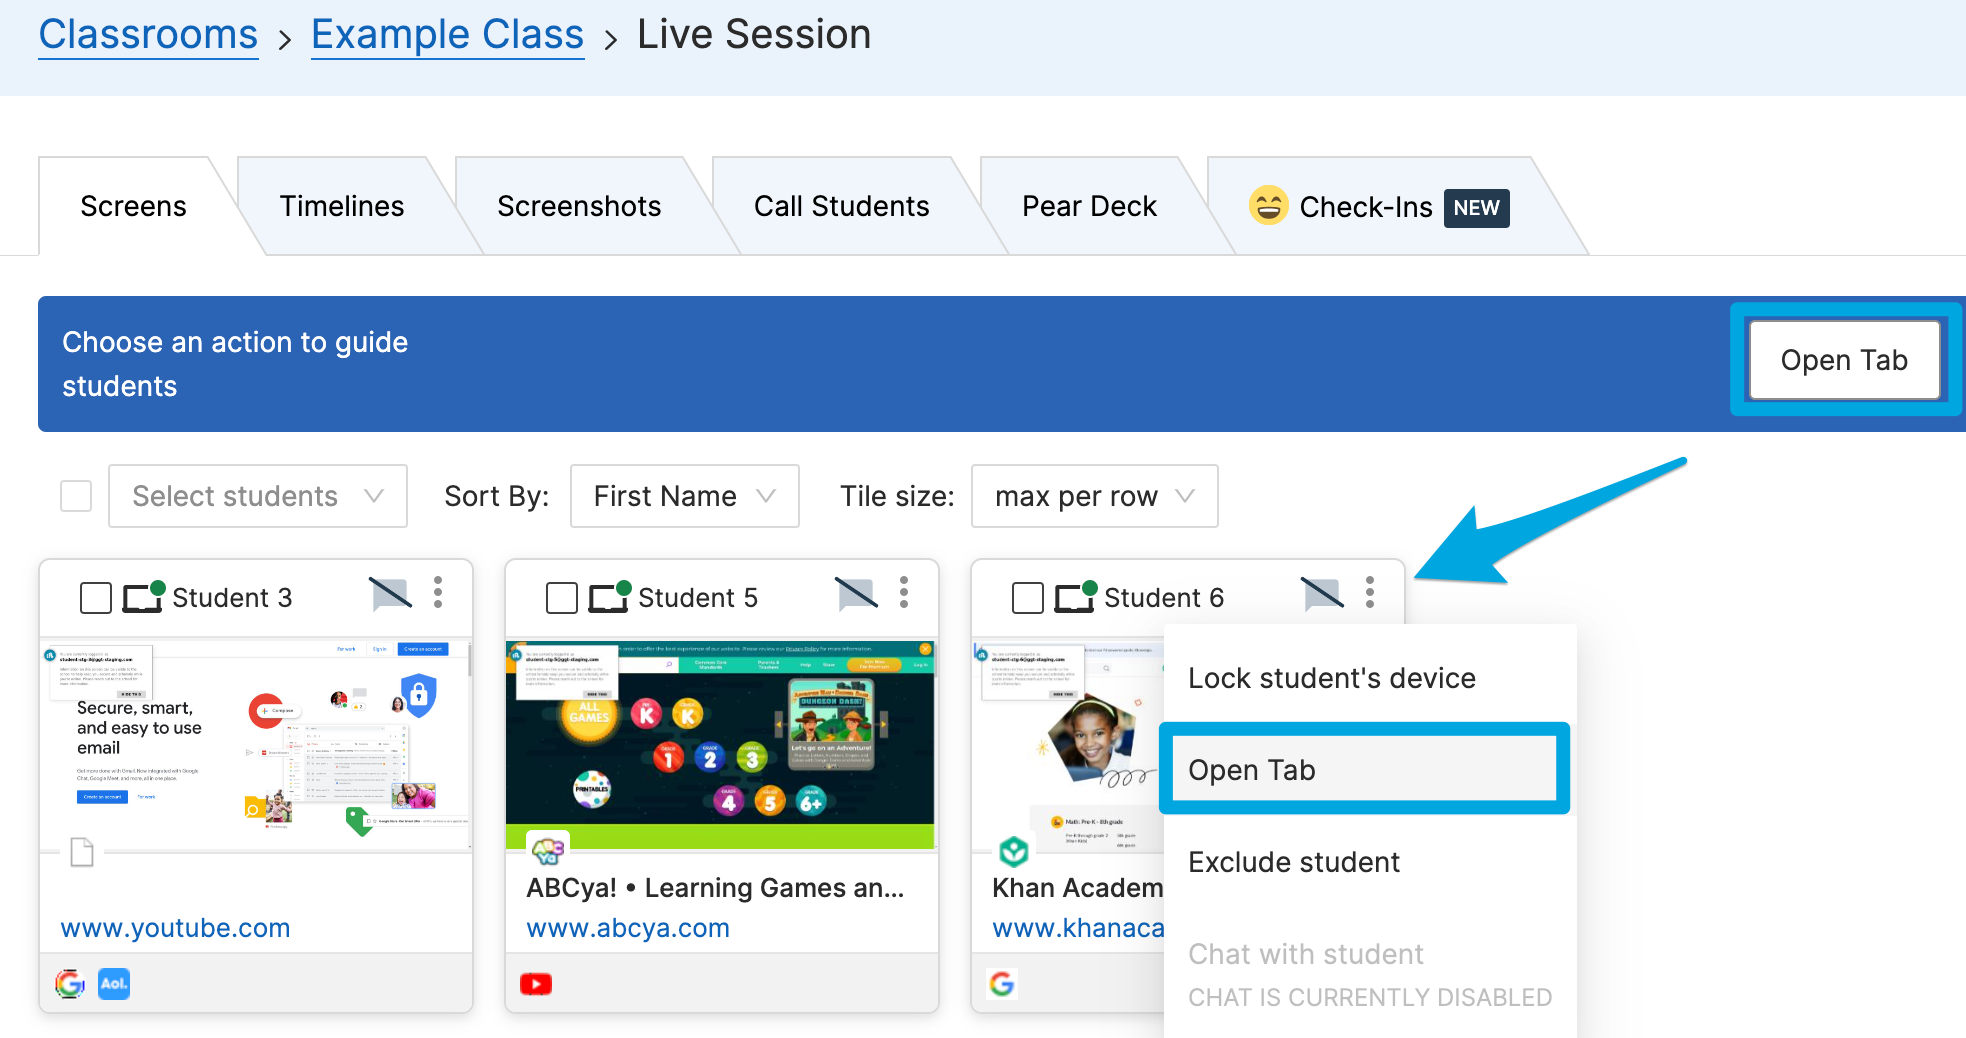
Open Tab
Direct your students to any web page by opening a new tab for them.
Opening a Tab for Multiple Students
- Click the Open Tab button
- Check the boxes next to Select All or choose specific students and click Next
- Enter a URL in the Open Tab interface and click Open Tab
Opening a Tab for One Student
- Click the 3 dots button in the corner of a student's tile
- Select the Open Tab button
- Enter a URL in the Open Tab interface and click Open Tab
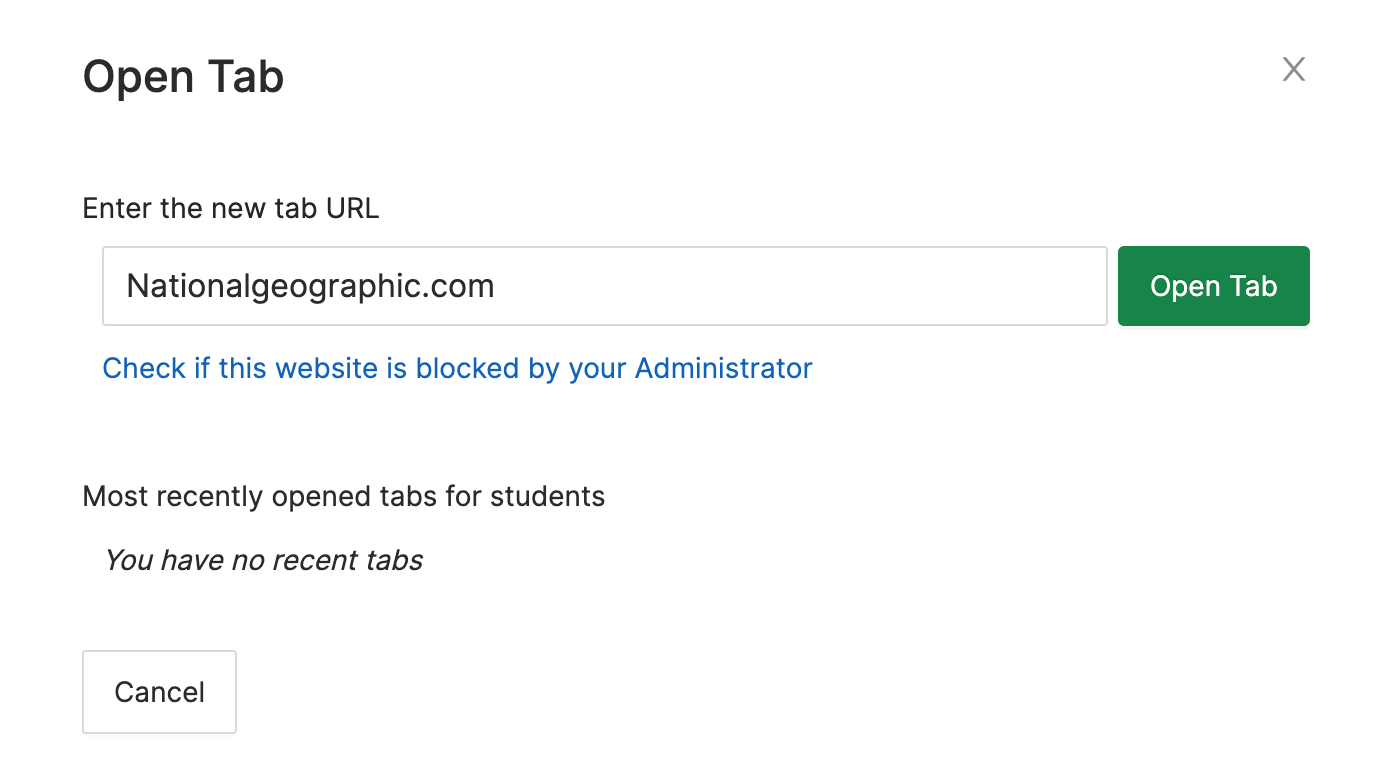
Note: Due to limitations of Chrome, the Open Tab command will not push the tab to a student's device unless they have a Chrome window open. If you see "no active tab" as a placeholder for a student's screen, ask the student to open Chrome, once you see an active tab, then send the open tab command.
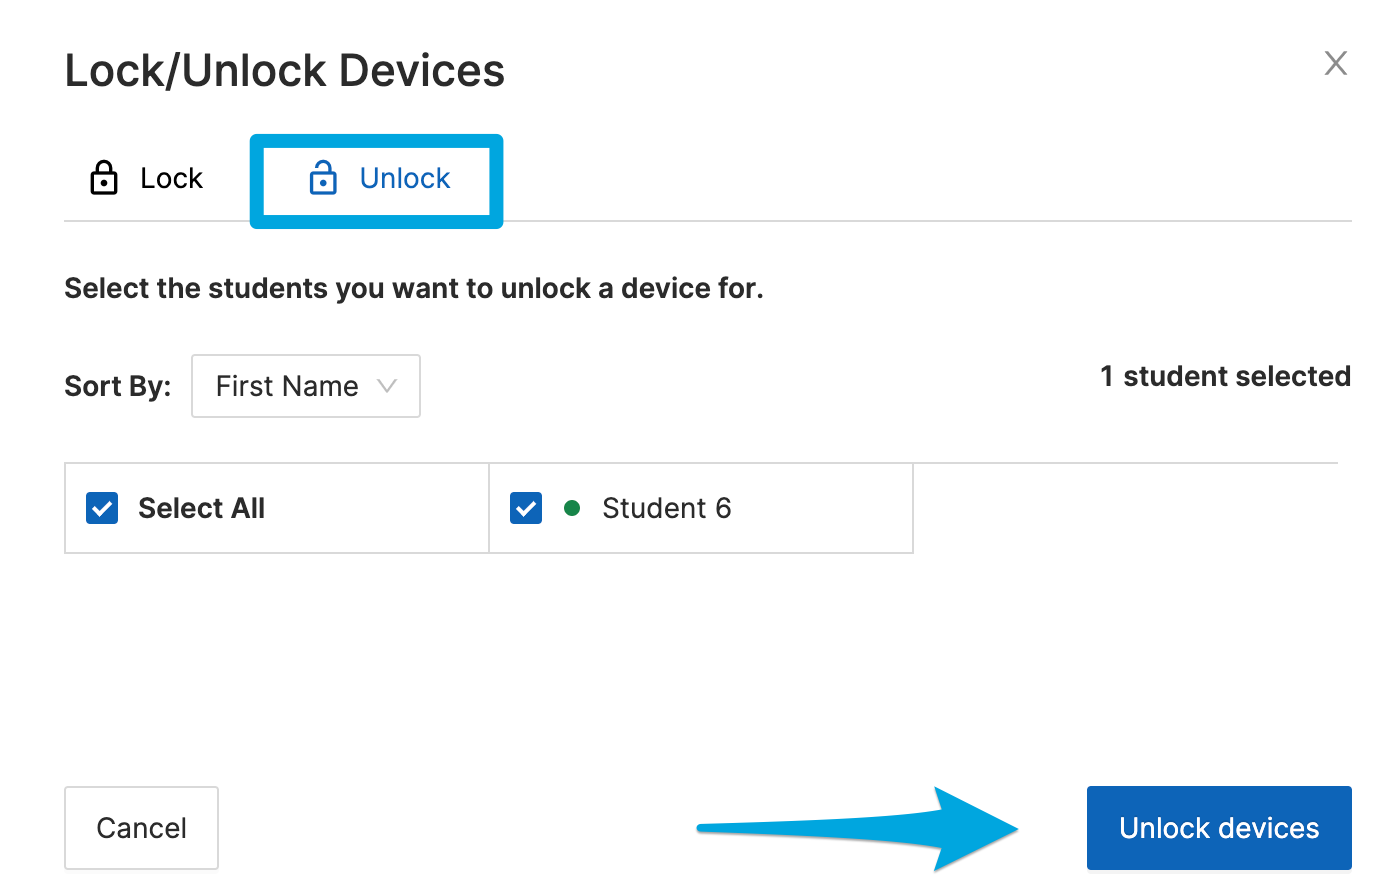
Lock / Unlock Screen
The lock screen command will mute and disable all Chrome windows on your student's device. The command is designed to unlock at the end of the session, but if a student joins a new session before the first session ends, they will remain locked.
To lock a student's screen:
- Select one or more students using the checkbox to the left of each student's name
- Click the Lock / Unlock device button
- (Optional) enter a custom message to be displayed on the locked screen
- Click Lock Devices on the Lock / Unlock Devices confirmation popup window

To unlock a student's screen:
- Select one or more students using the checkbox to the left of each student's name
- Click the Lock / Unlock device button
- On the Lock / Unlock devices popup window, click the Unlock button
- Confirm by clicking the Unlock Devices button
Annotate
With the Annotate Student Screen feature, teachers can place a colored circle on the webpage that the student is currently browsing to help guide them. On the student’s side, the circle will appear for ~10 seconds and then disappear. Teachers may also change the color and size of the pointer by using the Pointer Color and Pointer Size options.
This option is available on the bottom right of a student's screen view:
